Simple Magic Mirror

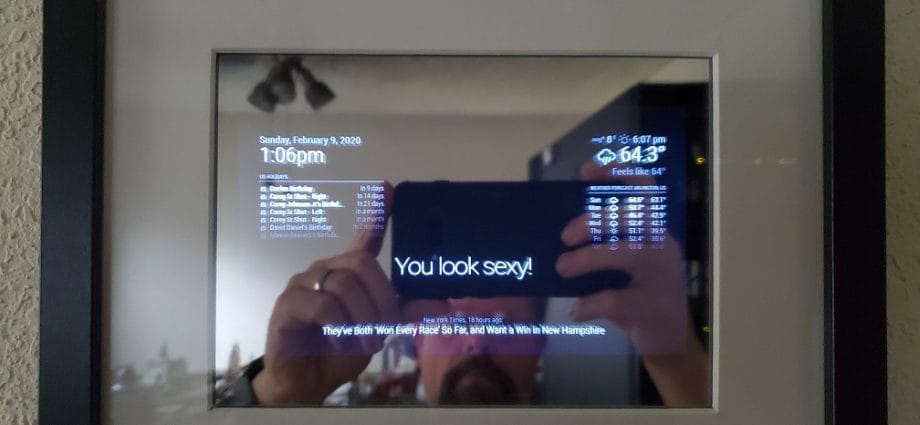
A Magic Mirror has been one of those projects I always wanted to build but I couldn't justify the expense to myself. In a recent issue of The MagPi (Issue 90, Feb 2020), they outline a small-scale, simple magic mirror project that can be built relatively inexpensively.
Supplies needed
- Ribba 8x10 frame
- Official 7" Touchscreen or Official 7" Touchscreen
- Raspberry Pi 4 or Raspberry Pi 4
- Micro SD card or Micro SD card
- Two-way mirror or Two-way film
- BLACK Gaffer, Duct tape or similar
Software needed
Setup
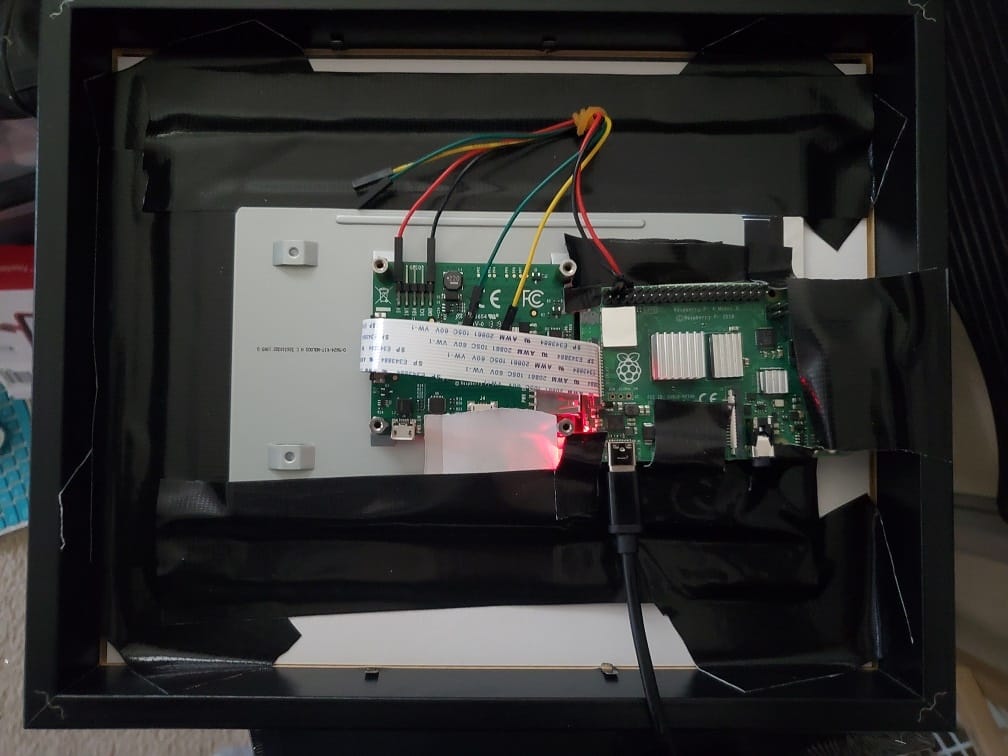
Once you get all your supplies, go ahead and image your SD with Raspbian. There are countless tutorials on this but the easiest is to use BalenaEtcher to complete. Go ahead and connect the display to the Raspberry Pi - keep the protecting film in place for now. I affixed the Pi to the back of the display with some carefully placed duct tape. We can add more later for stability. At this point you need to decide if you want to use a keyboard and mouse and work directly on the Pi and display or remote in via SSH. I booted onto the display, completed initial configurations and then used SSH for everything else.
Insert the now flashed SD and power up your Pi. Go through the typical setups, in particular, changing the hostname to make it easier to connect to later. Once you complete this and reboot you can start installing the MagicMirror package with these instructions. After you have it installed, fire up MagicMirror and play with the settings and modules. I prefer doing this way as it helps me later to make sure I have the display lined up satisfactory within the frame.
Assembly
Acrylic two-way (how I did it)
Open up the Ribba frame packaging and take everything apart. Peel off the protecting films taking care to keep dust and smudges off the glass then reinsert into the frame. I ordered the vinyl two-way cut to the size of the Pi Display so I reused the cardboard border of the Ribba. After reinserting the border, peel off the protecting film from the vinyl two-way and place onto the border. Again, be very careful with dust and smudges. Affix this in place with duct of gaffer tape.
Now you can remove the film from the Display and place the Pi and Display onto the frame. Apply a few small pieces of tape to help hold everything in place and start lining everything up. Once you are satisfied, apply tape generously to both hold the Pi and Display in-place as well as covering any visible areas of vinyl or border (to help with reflective loss and reducing extra light).
Two-way film (maybe next time)
Open up the Ribba frame packaging and take everything apart. Peel off the protecting films taking care to keep dust and smudges off the glass then reinsert into the frame. Reinsert the cardboard border as well. Apply the two-way mirror sheet directly to the Pi Display carefully trimming any excess away and being mindful of dust, smudges, and air-pockets. Once done, place the Pi and Display components into the frame and affix in-place temporarily with duct of gaffer tape.
Take a look and verify placement, making adjustments where necessary. Once you are satisfied, apply tape generously to both hold the Pi and Display in-place as well as covering any visible areas of vinyl or border (to help with reflective loss and reducing extra light).
Conclusion
Overall this was an easy project and relatively cheap (compared to some of my others). I think all in I was at less than $200 although technically speaking I already had the display and Pi lying around. The MagicMirror turned out great and makes me want to build a much larger version, maybe with a 21"-32" display.