It has been a long while since my last post. I’ve worked on quite a few projects and thought “I should post about that” but then never seem to make it to that part. So I guess I will just give some brief overviews and then if anyone wants more information, I’ll give more details (assuming I still have the project or remember how/what I did).
OpenAuto Pro
Do you have an older vehicle and wish you had the fancy touch screen interface that everyone else has? Or like me, do you have a motorcycle and want to control music, maps, and more without strapping your phone to the handlebars?
This is what led me to OpenAuto Pro (link). Using a Raspberry Pi and a touchscreen display, you can create a 7″ (or larger) interface that connects to you phone (Android/iOS) and be one of the cool kids (j/k). I had actually come across the system a long while back but got interested again after seeing Novaspirit Tech doing a review (link).
Long story short, I ended up making two. I installed one in my VTX1800C fairing with an audio amplifier and then built another standalone unit with GPS that I can use in any vehicle.
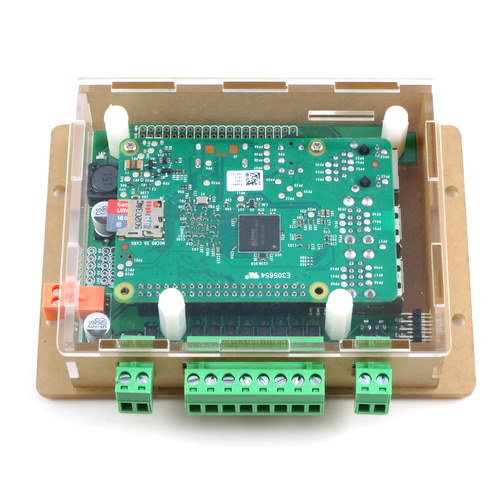
OpenSprinkler Pi
We live in Texas atop a seemingly endless mound of clay. Even with store-bought soaker hoses, we have repeatedly suffered from shifting foundation issues which has lead to cracks in walls and doors not functioning properly.
I decided that the soaker hoses where not cutting it and I hated replacing them each year so that led me to installing a sprinkler and irrigation system. If you have ever priced a system out by a ‘professional’ then you know this is a significant investment. But what if you could do it yourself and use some techy gadgets at the same time?
OpenSprinkler and their OpenSprinkler Pi (link) to the rescue!

Now I do not want to oversimplify this as it was still a lot of work to dig and lay hose but it was still cheaper in the long run. Between the Pi, OpenSprinkler, hose, sprinkler heads, drip tips, irrigation valves AND renting a trencher – I spent about $600. Now my foundation and yard are watered on easily adjustable and repeatable schedules.
PiMox (ProxMox)
As mentioned in an older post, I use ProxMox (link) as the virtualization manager in my homelab. Due to electrical limitations in my home (and the bill) I have been wanting to maintain my cluster but reduce overall consumption.
The concept and practice of using a Raspberry Pi to host ProxMox is not a new one but certainly made usable by PiMox (link). Now I am not saying this is the save the world solution but it may help round-out a cluster and provide a way to run ARM specific VMs. I decided to not make it Production but I was able to create both WordPress and NextCloud instances on it.
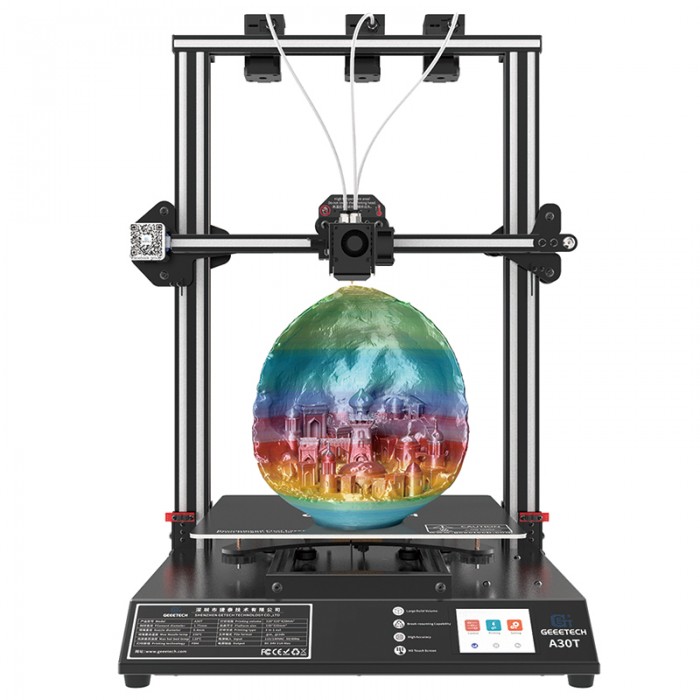
Geeetech A30T
As I print more and more items I have repeatedly hit size limitations of my existing printers. Already having a fair amount of success with the Geeetech A20T, I simply upgraded to the larger A30T (link).
This brand does not get a whole lot of favorable reviews and I can vouch for many of the same issues but also believe that 1) many can be resolved and 2) I believe most printers in the same price range suffer from similar issues. Both points are usually made lesser by level of community support.
The types of issues I have encountered have mostly been due to firmware settings, bed leveling, or slicer settings. And, although there is a time delay due to them being in China, their tech support has been very responsive for me.

Repetier Server
With the addition of yet a 3rd 3D printer, OctoPrint just was not supporting my needs – at least not without additional hardware or really stressing a Pi out. Do not misread me here, OctoPrint is awesome and I used it happily for years. I had also previously used Repetier-Host and remembered they also provided a server instance to manage remotely.
Repetier-Server (link) is able to easily manage all 3 of my printers, provide camera views, and arrange sliced files. To finish it off, I added a 7″ touchscreen and mounted it so I could control any printer while standing in front of them. I am not necessarily running a print farm but this enabled me to run all 3 with room for more and not invest in additional hardware or expensive software, and I can still sit at my desk and control them over the lan.
FaceCam
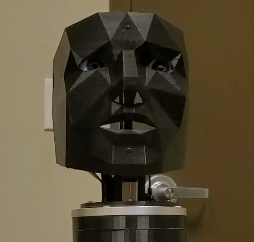
I’ll start with saying for each person that thinks this is cool, another thinks it is creepy. So much in fact that my wonderful wife made me take it to my office as she did not want it looking at her 🙂
So I had actually started this back in late 2020 and the idea had been to have a pair of eyes that followed your movement around the room. I built the prototype by had issues with the coding (because I cannot code) and it just sat on a shelf. When I got back around to it (thanks to the help of Tim at Core Electronics {link} and Claude Pageua {link}) I had decided it should be an entire face since when we look at something we humans move our entire heads.
This was a lot of fun to make as I was able to use both 3d printing, Raspberry Pi and a couple of servos. I have the sketches if anyone wants them or maybe I’ll add to thingiverse one day.
Solar fun – or kinda fun
Last but not least is my most expensive hobby-ish project of the recent year. What started as a 25W solar panel connected to 3 18650 batteries just to power an ESP32Cam quicky turned into 2 320W panels, a 48V 100Ah lithium battery with a 3.5kW controller and generator back-up. This is now what powers about 50% of my homelab although I do still have to siphon some grid power at night.
For now it helps reduce some of my daytime grid-power usage and acts as a large UPS all the time. This is nice as to protect my servers and prevent a 1-2 day 3D print from getting interrupted.
I like it and will be growing the system as funds permit but here is my warning to all – IT IS NOT CHEAP. I am sure that logistics-related issues are still affecting the costs of many items but solar is considered an investment for a reason. If you are doing this at home it may take years to really get your ROI back but you will have to determine if it is worth it for you. There are a plethora of reasons to move to solar, just be prepared to pay for it.
Summary
I have more to add and hopefully won’t take near as long to get posted. I always have a few projects going and my most recent will likely take a full year to complete – but it is one of the most interesting so far.
