A better garage door opener

One of the devices that I was particularly proud of was my voice and Home Assistant controlled garage door opener. I took a z-wave dry contact switch and wired it to a spare key-chain door remote and it worked amazingly well. I connected a z-wave door sensor and wrote some scripts to notify me if it was left open too long. At the time, no one had written any great how-to's on Home-Assistant page so I felt a sense of accomplishment in having successfully getting it to work. This served me well for a few years. One day, it stopped working. After a bit of troubleshooting, it would seem that the z-wave part of the set-up (main part!) was no longer connecting. Time to build a better garage door opener!
Research
Since the original had served me so well I figured I initially thought I would just rebuild. When I re-priced the dry contact switch it had gone up about 20% which did not make the thought of possibly needing to doing this every few years appealing at all. I started searching for alternatives and eventually landed on a ESP8266 option. There were two or three write-up and videos so this method looked promising. I had never really worked with ESP8266 before only having played with an Arduino a couple of time for a robot project. For the most part I followed D Khaz' page so I want to be sure to give credit where it is due.
Parts
- Housing/Case - a little something to hold all the parts; use what you have but since this is in the garage, I used this.
- Garage Remote - some can connect directly to their motor-box but I could never figure mine out; I already had these so be sure to get one that matches your unit.
- Wemos D1 Mini - a small ESP8266 based microcontroller that provides Wi-Fi back to Home Assistant.
- Wemos Relay Shield - relay for triggering door via garage remote.
- Wemos DHT shield - might as well make it multi-purpose.
- Wired Reed Switch - magnetic reed switch for door state; I used a NO but code can be edited for NC.
- Power Supply - 2.5A is overkill for this but I buy these in bulk for all my Raspberry Pi 3 setups.
- Extra Wire - for runs to the Reed Switch (if needed).
- Hot Glue Gun - just about any should work; don't forget the glue sticks.
- Soldering iron - again, any should work; don't forget the solder.
Assembly
I would be remiss if I did not mention two things. One, this involves soldering and two, matching the header leads beforehand can lead to a much smaller, compact finished product. With that said, I am of practice on soldering at this small a level and undoubtedly am not very good at matching headers. If you are better at this than I am, you can solder and then assemble the Wemos D1 Mini, Relay board, and DHT in a single stack leaving only the power lead, wires to the remote, and wires to the magnetic reed switch coming out. If, on the other-hand you are like me, there will be a few wires running between the components in addition to the ones from the previous sentence.
Wiring

Code
esphome:
  name: esphome_garage_door # choose your name
  platform: ESP8266
  board: d1_mini

wifi:
  ssid: 'wifissid' # enter you wifi name
  password: 'wifipassword' # enter your wifi password
  fast_connect: on
#  Optional to change deafault domain of .local
#  domain: .local.lan

api:

ota:

#  Optional to have direct access via IP
web_server:
  port: 80

logger:

binary_sensor:
- platform: gpio
  pin:
    number: GPIO13
    mode: INPUT_PULLUP
    inverted: True # change to False if using NC reed
  name: "Garage Door Sensor" #name to be used in HA
  device_class: garage_door
  filters:
    - delayed_on: 20ms

sensor:
- platform: dht
  pin: GPIO2
  temperature:
    name: "Garage Temperature" #name to be used in HA
    filters:
    - lambda: return x * (9.0/5.0) + 32.0;
    unit_of_measurement: "°F"
  humidity:
    name: "Garage Humidity" #name to be used in HA
  update_interval: 60s
  model: AM2302

switch:
- platform: gpio
  id: relay
  pin:
    number: GPIO5
    inverted: False
  restore_mode: ALWAYS_OFF
- platform: template
  name: "Garage Door Switch" #name to be used in HA
  icon: "mdi:garage" #icon to be used in HA
  turn_on_action:
  - switch.turn_on: relay
  - delay: 1s
  - switch.turn_off: relay
- platform: restart
  name: 'Garage Door REBOOT'  #name to be used in HA

status_led:
  id: status_led1
  pin:
    number: GPIO12
Upload your code
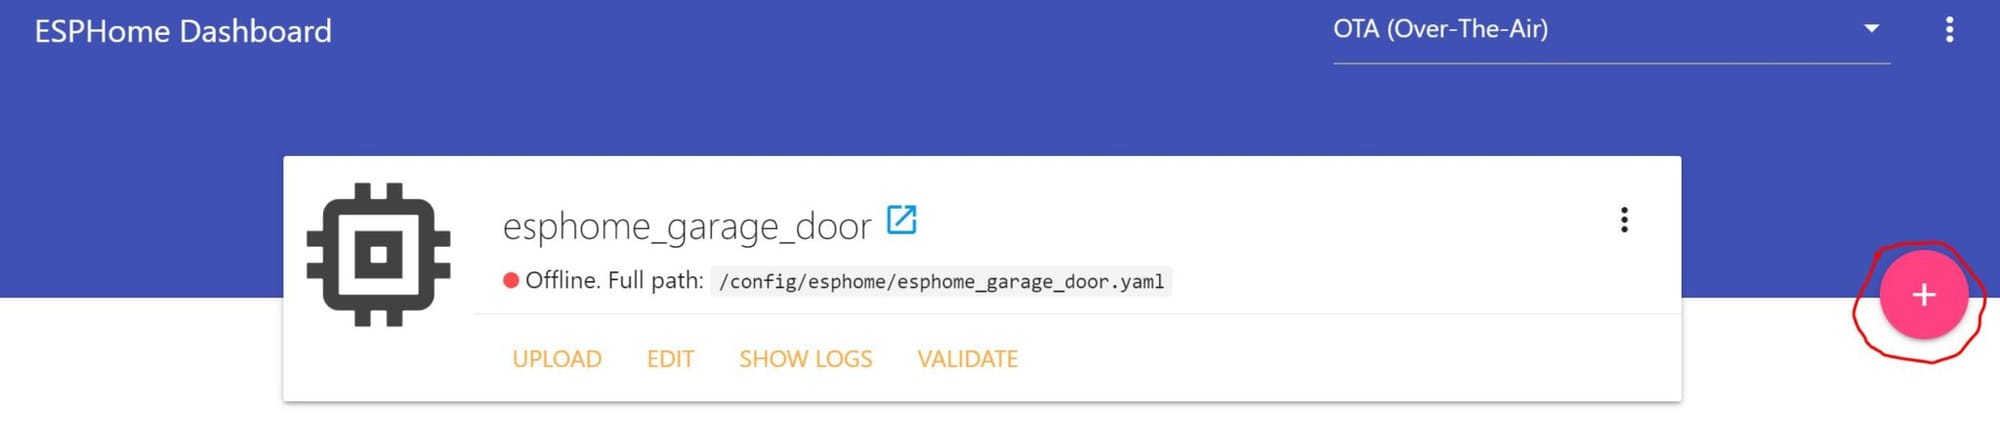
This will be a short section... There are a few ways to do this. Originally I used an Arduino or Pi, but since I already run Home Assistant, now I use the ESPHome plugin. Instructions can be found at the linked page.
Home Assistant inclusion
Once you have flashed the Wemos D1 Mini, add the device to your Home Assistance instance. See below:
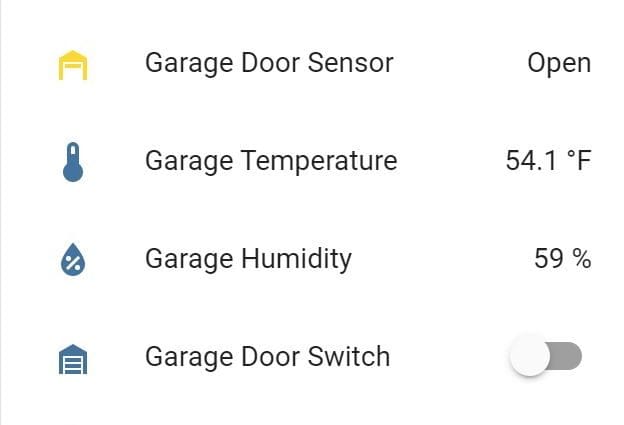
Once this updates you can then select your new controls and create a group card:
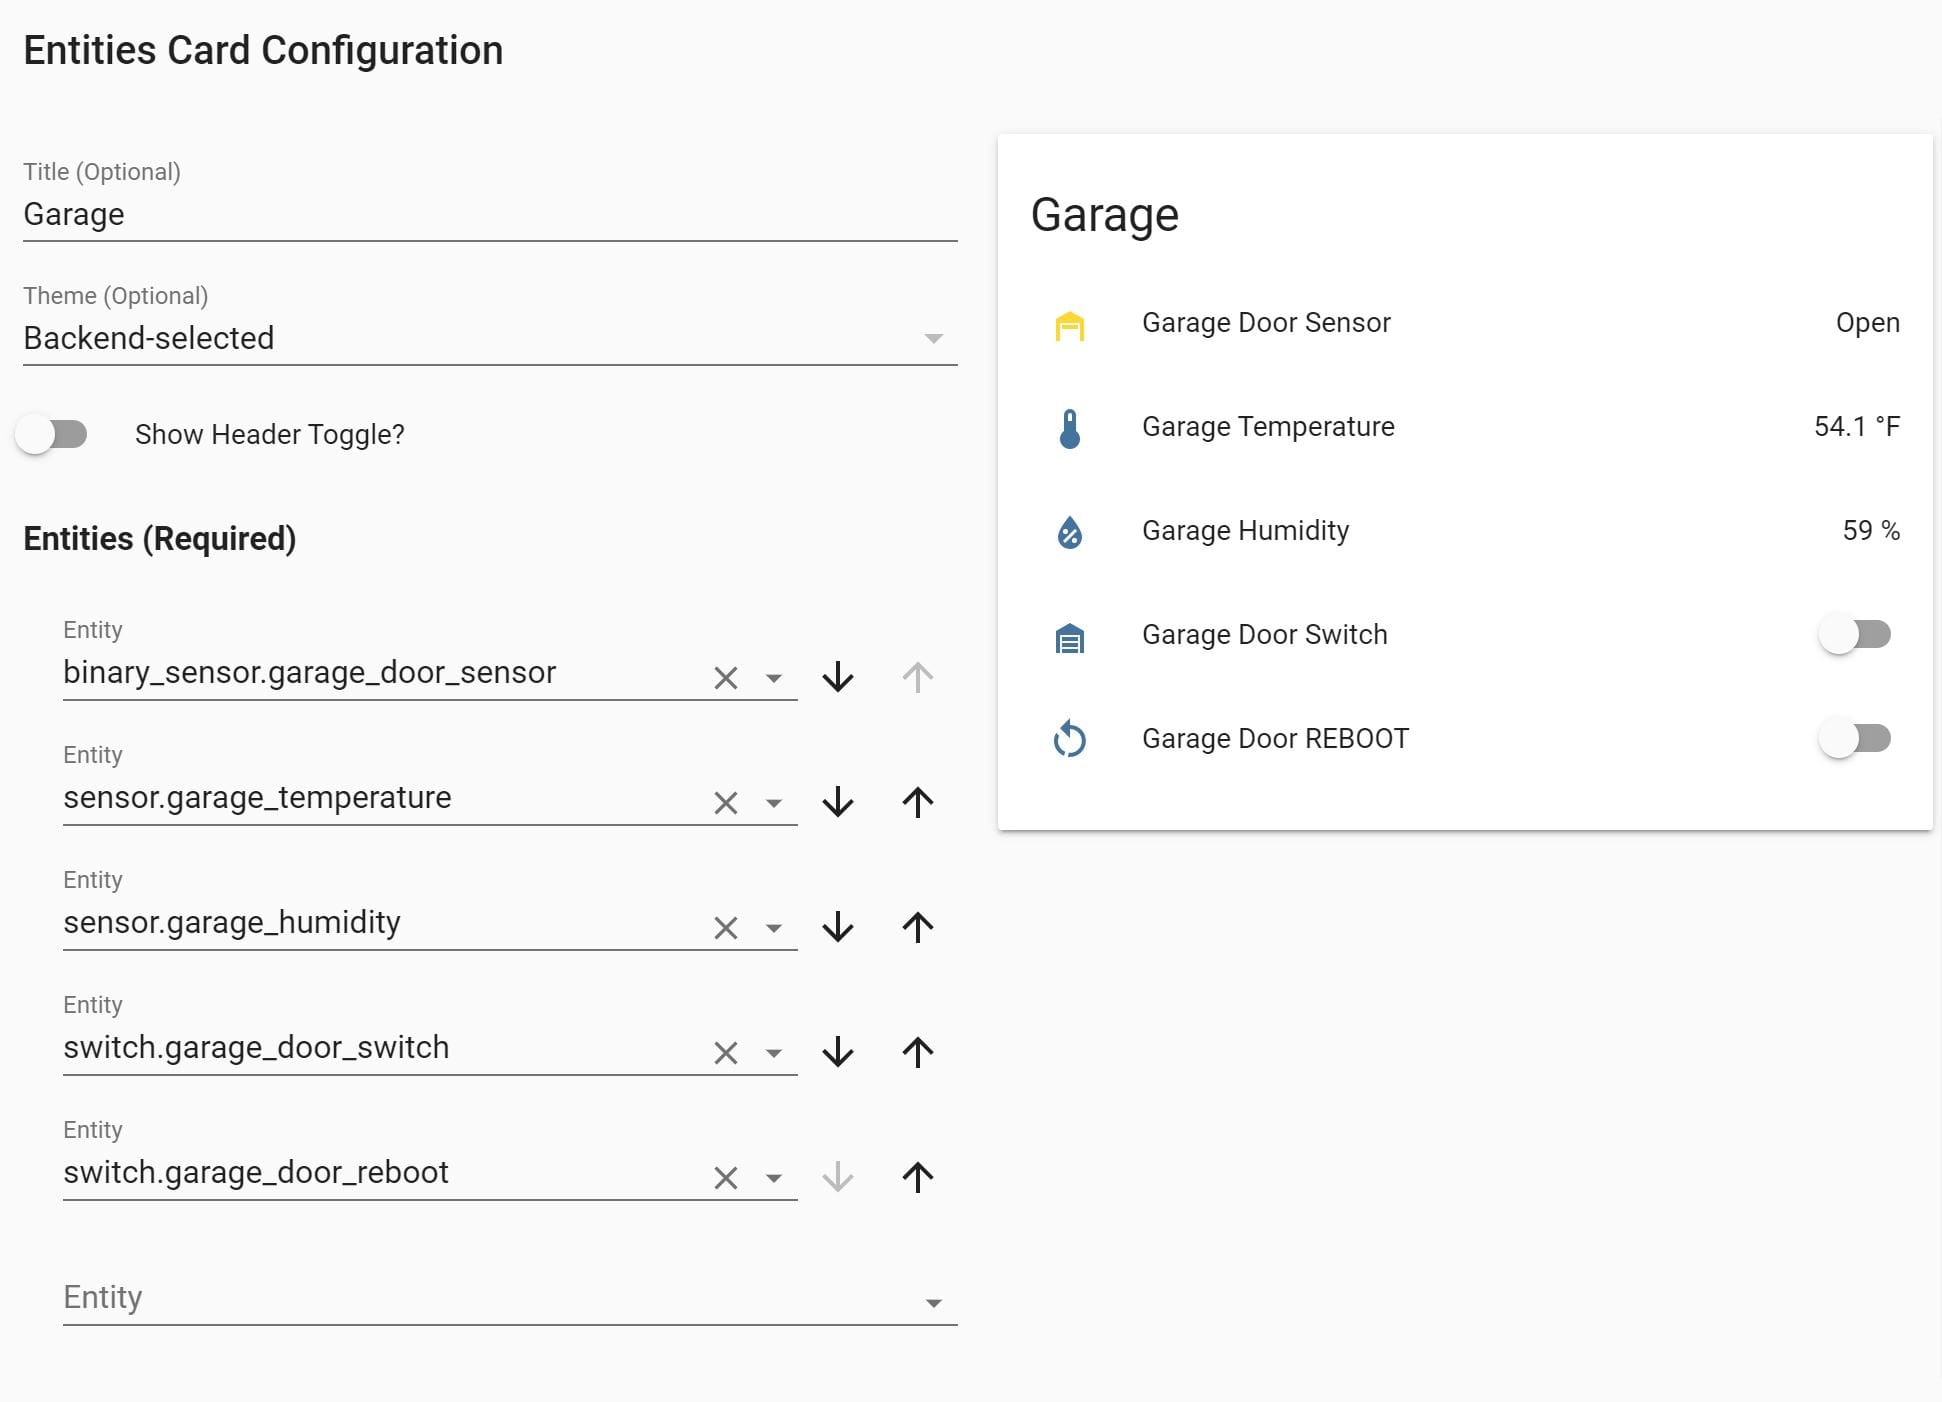
Wrap-up
That was pretty much it. This was my second Wemos D1 Mini / ESP8266 device (see Better Plant Sensor) and, thus far, I am very intrigued. I am actively searching for other devices I can build, hone my soldering skills on, and ultimately add to my home automation. If you have any cool ideas, drop me a line.