Airbrush Booth made "Smart"

Setting the stage
This Smart Airbrush Booth post stems from building my InMoov robot, Bob. When I decided to build Bob, I chose the color that I imagined I wanted him to be or as close as I could get to it. Throughout the printing process I experienced countless surface quality issues. Although I am positive many of these defects could have been avoided, it left me feeling frustrated with the outcome nonetheless.
Thanks to some wonderful and helpful Discord users, I realized that I was not alone and that many choose to sand, fill, and paint their robots to achieve the quality and coloring they desire. Aerosol paint cans can be quite messy, not to mention needing 'ideal' conditions (wind, temperature, debris) to achieve decent results so I investigated airbrushing as an alternative. As usual, my wonderful wife spoils me and now I have a MASTER G22 Multi-purpose Airbrush Kit.
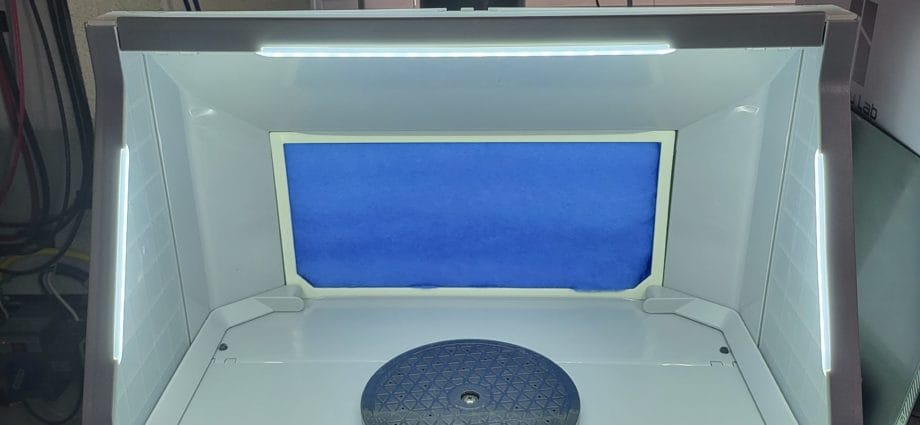
Back to the 'ideal' conditions issue though, I want to use my new airbrush indoors where I can control those conditions and multi-task as I see fit. To achieve this I added an Airbrush Spray Booth Kit to my collection of tools. But wait! I have to hit buttons and there is no way to adjust fan speed or light brightness?
Damper
This begins with the venting system; Although the Airbrush Booth is capable of folding up for storage or transporting, realistically it will reside in a single place for an extended period of time. As my windows are difficult to access due to the other projects and supplies, I need to be able to seal off the flow of air when not in use. I consider myself to be a maker, novice at least, so I started designing.
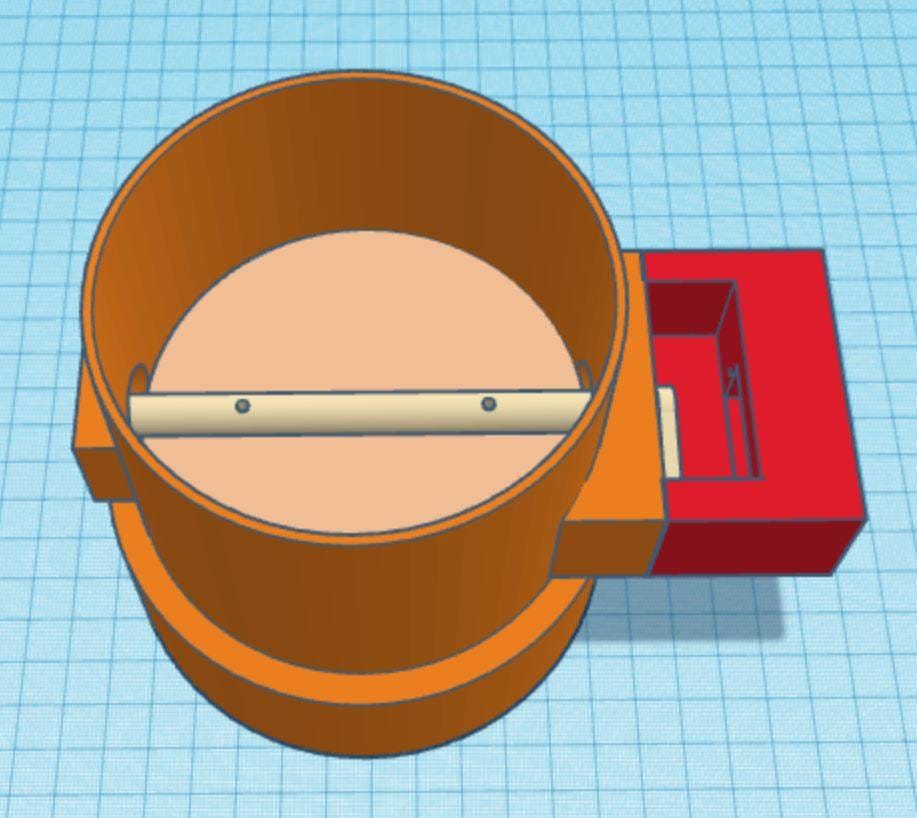
The Airbrush Booth has a 4" collar on it and comes with an adapter for the hose. The VentDamper_Body is just large enough to slip over the existing collar and then the adapter can be used on the exhaust side. Two 608 bearings hold the VentDamper_Rod in the VentDamper_Body allowing free movement. The VentDamper_Door attaches to the VentDamper_Rod with 2 M2.5 bolts and locknuts. There is a little room around it but I do not feel that it is enough to create any serious issue. A SG90 or similar micro servo is strong enough to turn the rod and door. Lastly, slip VentDamper_ServoCover over the servo and use either 2 or 4 M3 screws or bolts to attach. I used heat insets on mine for longevity.
Fan
The Airbrush Booth's factory wiring is very simple. To achieve On/Off and speed control I am using a L298N. Snip the fan wires then connect matching reds (POS+) and blacks (NEG-) together. Next run wires from OUT1 and OUT2 back to the fan wires. I learned that these 120mm PC case fans only rotate in one direction so if they do not actuate, just reverse the wires on the L298N. (Further research will need to be done to accomplish bi-directional flow.)
Lighting
The Airbrush Booth's LED lighting is a basic 12V White LED strip. We can use the other output of the L298N to control them. Snip the factory wires and run new lengths to the OUT3 and OUT4 on the L298N. Same as the motor, if these do not illuminate later, just reverse the wires on OUT3 and OUT4.
The "Smart" part
I do not have many ESPHome integrations in my HomeAssistant but depending on how much you enjoy tinkering, there are an abundance of options. I am using a NodeMCU but a Wemos D1 should work as well. Using ESPHome and ESP/NodeMCU will create switches and controls for the damper, fan, and lighting.
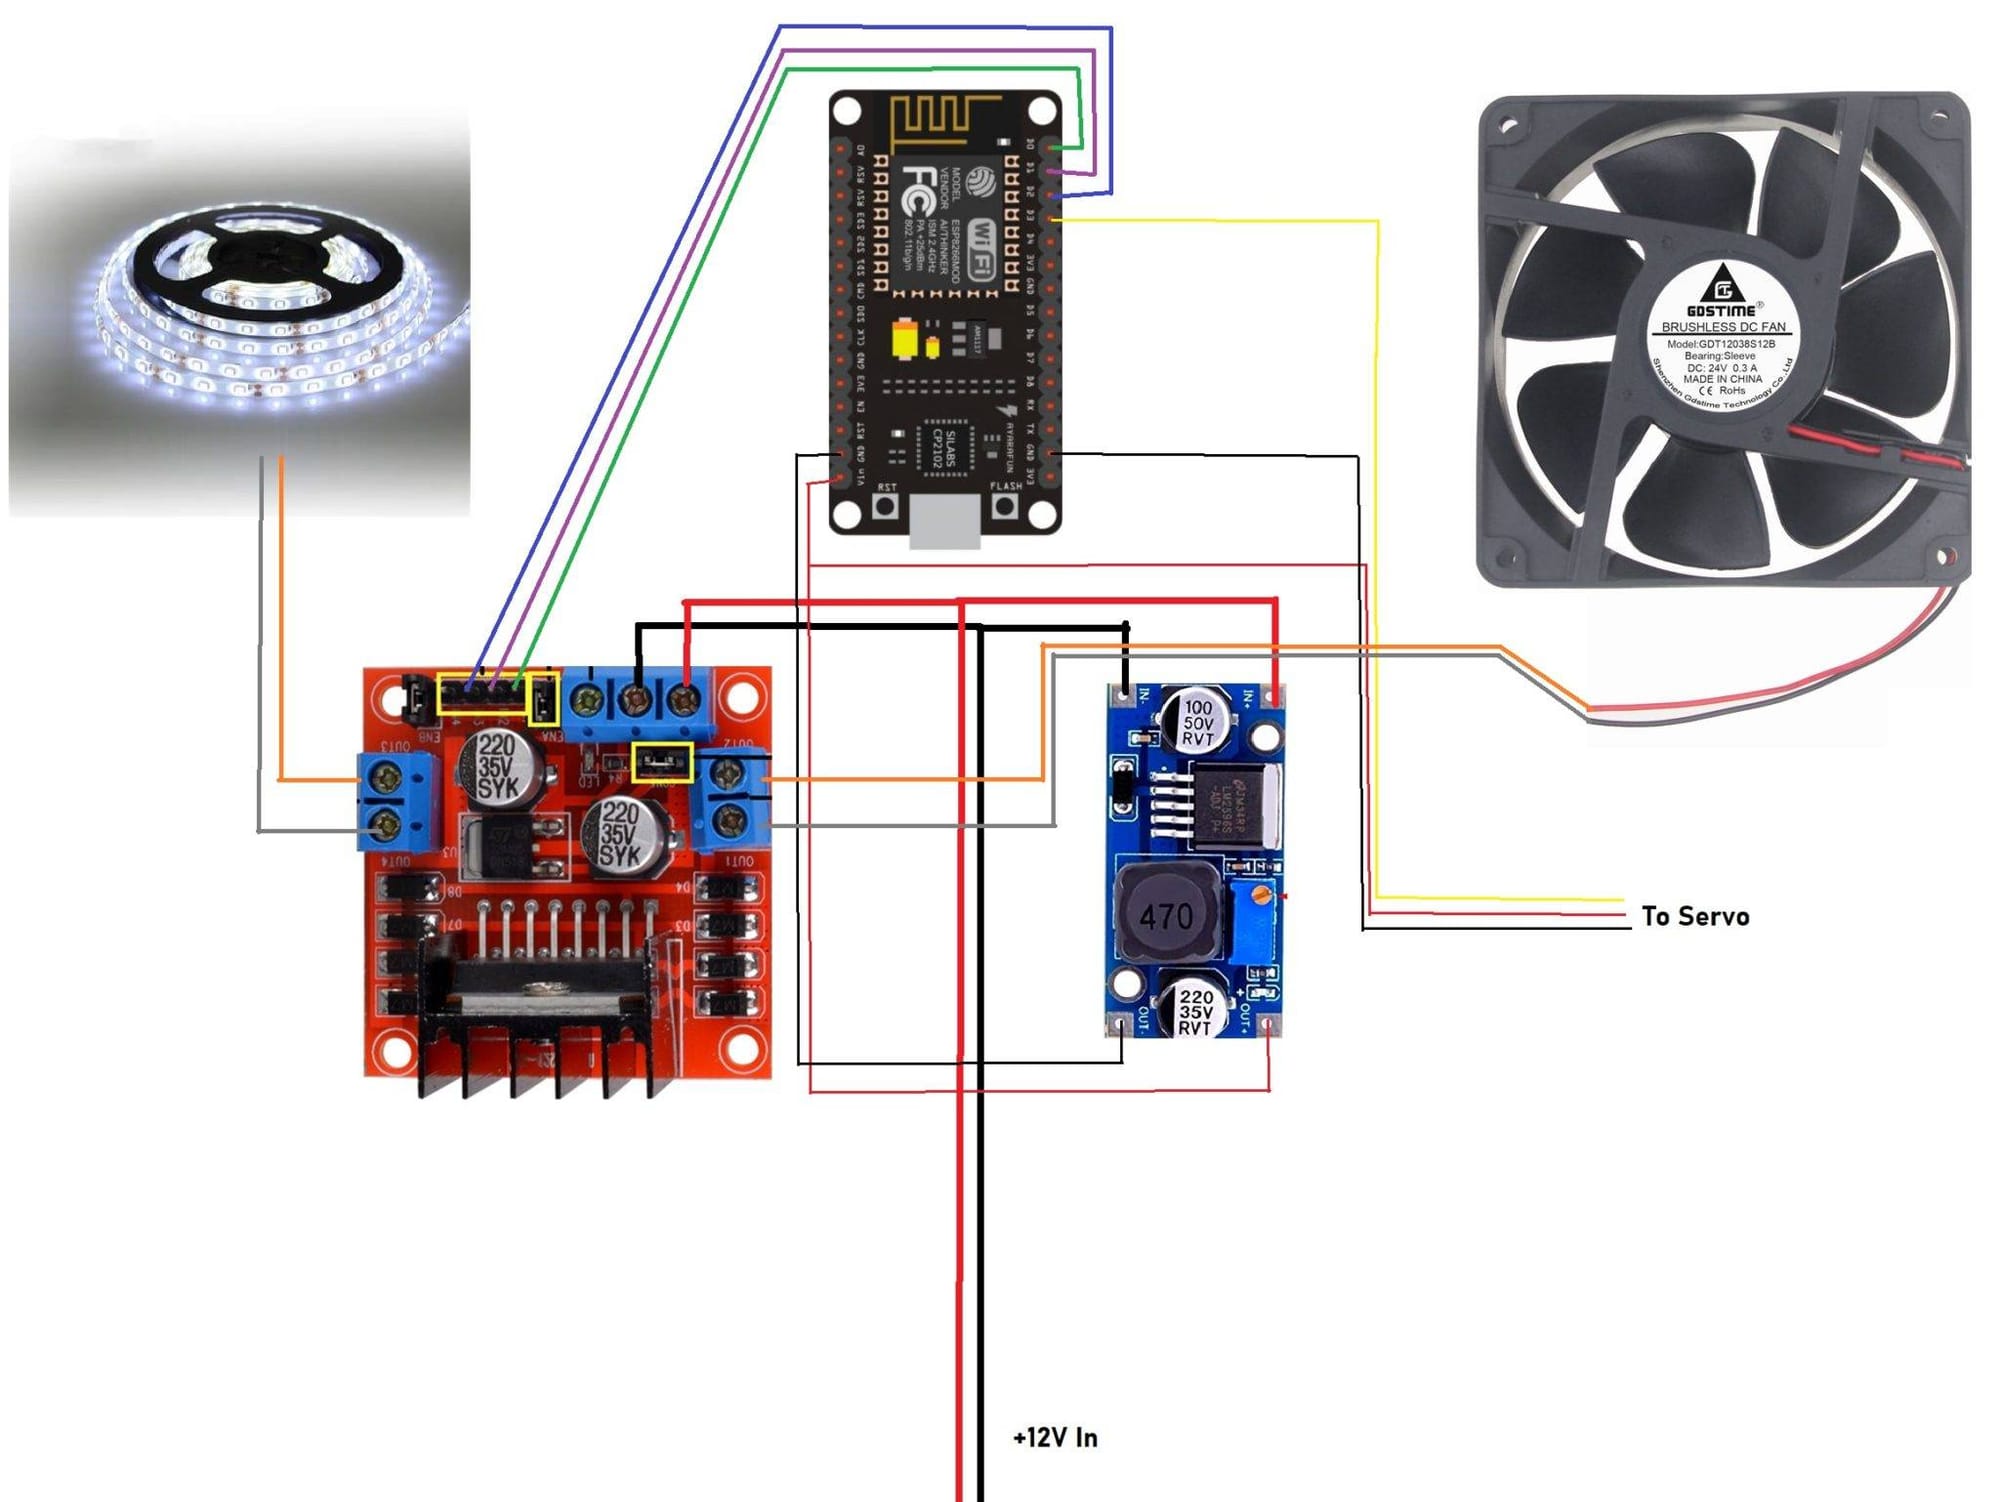
Below is an image of the circuit explanation. Please pardon my rudimentary schematic skills. The NodeMCU acts as the brain, interconnecting from ESPHome/HomeAssistant to the devices being controlled. Use a 12V power source such as the one that comes with the Airbrush Booth. Set the potentiometer on the LM2596 to reduce the 12V down to 5V to power the NodeMCU and Servo. Supply 12V to the L298N which will pass the power onto the fan and LEDs.
The code for ESPHome is below. Other than the SSID and Passwords, this is the code from my vent.yaml file. FYI, I do not get very creative with my names and IDs so feel free to change them. The percentage levels under 'cover:' determine the servo position of Open, Stop, and Close.
esphome:
name: "vent"
esp8266:
board: nodemcuv2
logger:
api:
encryption:
key: "your_key"
ota:
password: "your_OTA_password"
wifi:
ssid: "YOUR_NETWORK_SSID"
password: "YOUR_NETWORK_PASSWORD"
ap:
ssid: "Spray-Tent Fallback Hotspot"
password: "FALLBACK_PASSWORD"
captive_portal:
web_server:
port: 80
output:
- platform: esp8266_pwm
id: pwm_output
pin: D3
frequency: 50 Hz
- platform: esp8266_pwm
id: motor_forward_pin
pin: D0
inverted: false
- platform: esp8266_pwm
id: motor_reverse_pin
pin: D1
- platform: esp8266_pwm
id: pina
pin: D2
- platform: esp8266_pwm
id: pinb
pin: D4
servo:
- id: damper
output: pwm_output
cover:
- platform: template
name: "Tent Damper"
id: tentdamper
optimistic: true
device_class: damper
open_action:
- servo.write:
id: damper
level: 95.0%
close_action:
- servo.write:
id: damper
level: -18.0%
stop_action:
- servo.write:
id: damper
level: -18.0%
- servo.detach: damper
fan:
- platform: hbridge
id: tentfan
name: "Tent Fan"
pin_a: motor_forward_pin
pin_b: motor_reverse_pin
decay_mode: slow
light:
- platform: monochromatic
name: "Tent Light"
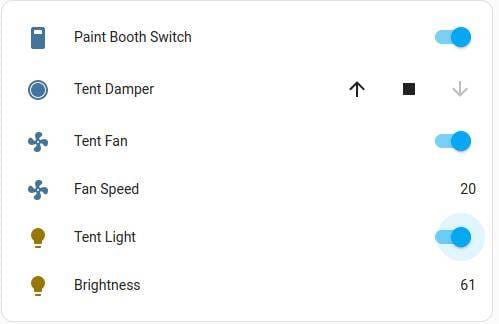
output: pinaWith this code, I now have the below card in my HomeAssistant and since I have voice command as well I can open the damper, set the fan speed, and the light level whenever I am ready to paint! A little script can also be generate to combine the activities in to more simplified "Turn on Booth" which will accomplish all 3 actions at one. (The "Paint Booth Switch" is separate, controlled main power to the Airbrush Booth).
Hope this is useful to someone or inspires you to make something your life a little "smarter". All files are located at the end of the post, which includes the ESPHome code. I also have the Vent Damper files available at Thingiverse.
