Plant soil moisture sensor


As mentioned in my October update, my wife wants to add a house plant. This may not seem like anything newsworthy but in our home, plants come with an expiration date. She really wants one and I'd rather it not die so luckily I came across a soil moisture sensor.
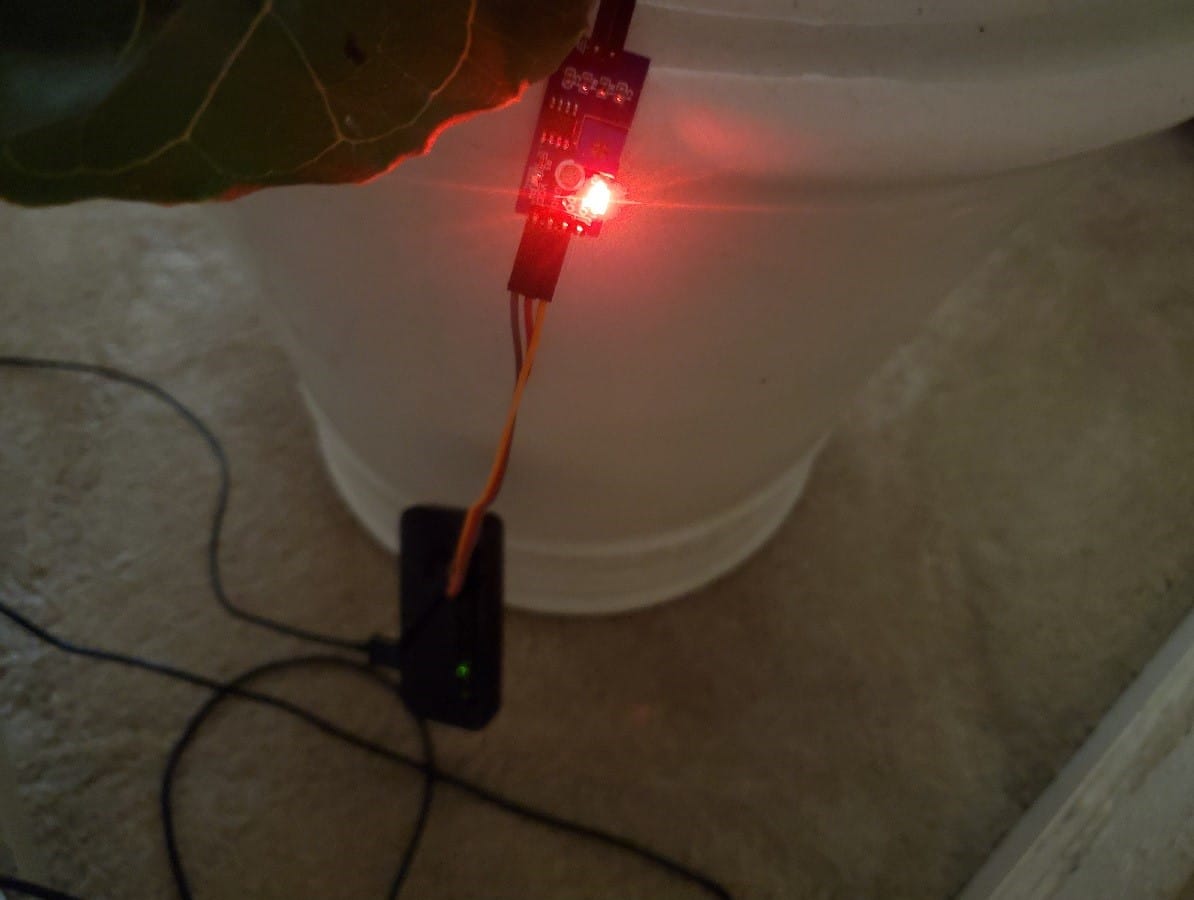
The Pi Hut has a lot of great write-ups as well as having an excellent selection of Raspberry Pi accessories. I like the one for the soil moisture sensor in particular as it uses the small-sized Pi Zero W (which I already had lying around), can be standalone, and is minimally obtrusive.
Supplies
- Pi Zero W or Pi Zero WH - I am not the best at soldering so I try to keep a WH model that has the header already soldered.
- Memory Card - can never have too many of these. I have plenty of 16 and 32 MB lying around but an 8MB will suffice.
- Sensor & Probe Kit - great kit with everything you need to build multiple sensors.
- Power Supply - If you don't purchase a kit.
Preparations
I have found that the preparatory steps are often left out of many instructions so just to make it clear, you need to:
- Format and image your SD card
- Add SSH & WiFi to the boot directory
- Boot and then update your Pi Zero
Assembly
Everything fit together easily. Using the instructions from The Pi Hut, I connected the 5 wires and was ready to move on within a minute or two.
- Probe => Sensor: 2 pins (any order) to the 2 pin side of the sensor
- Sensor => Pi:
- VCC => 3v3 (Pin 1)
- GND => GND (Pin 9)
- D0 => GPIO 17 (Pin 11)
Code
I started with the code supplied by The Pi Hut but found it did not fit my needs completely. There were missing dependencies and it would not connect to the Gmail account I use as it lacks StartTLS. Also, when I went to make it launch at boot, I received multiple format and library errors. Here is what I ended up with.
!/usr/bin/python

# Start by importing the libraries we want to use

import RPi.GPIO as GPIO # This is the GPIO library we need to use the GPIO pins on the Raspberry Pi
import smtplib # This is the SMTP library we need to send the email notification
import time # This is the time library, we need this so we can use the sleep function

# Define some variables to be used later on in our script

smtp_username = "[email protected]" # This is the username used to login to your SMTP provider
smtp_password = "accountpassword" # This is the password used to login to your SMTP provider
smtp_host = "smtp.gmail.com" # This is the host of the SMTP provider
smtp_port = "587" # This is the port that your SMTP provider uses
smtp_sender = "[email protected]" # This is the FROM email address
smtp_receivers = ['[email protected]'] # This is the TO email address

# The next two variables use triple quotes, these allow us to preserve the line breaks in the string.
# This is the message that will be sent when NO moisture is detected

message_dead = """From: Sender Name [email protected]
To: Receiver Name [email protected]
Subject: Moisture Sensor Notification
Warning, no moisture detected! Plant death imminent!!! :'(
"""

# This is the message that will be sent when moisture IS detected again

message_alive = """From: Sender Name [email protected]
To: Receiver Name [email protected]
Subject: Moisture Sensor Notification
Panic over! Plant has water again :)
"""
# This is our sendEmail function

def sendEmail(smtp_message):
         try:
                 smtpObj = smtplib.SMTP(smtp_host, smtp_port)
                 smtpObj.starttls() # This is the part that gmail needs to create a secure connection on port 587
                 smtpObj.login(smtp_username, smtp_password) # If you don't need to login to your smtp provide you can omit this line
                 smtpObj.sendmail(smtp_sender, smtp_receivers, smtp_message)
                 print ("Successfully sent email")
         except  smtplib.SMTPException:
                 print ("Error: unable to send email")

# This is our callback function, this function will be called every time there is a change on the specified pin

def callback(channel):
    if GPIO.input(channel):
        print ("LED off")
        sendEmail(message_dead)
    else:
        print ("LED on")
        sendEmail(message_alive)

# Set our GPIO numbering to BCM
GPIO.setmode(GPIO.BCM)

# Define the GPIO pin that we have our digital output from our sensor connected to
channel = 17

# Set the GPIO pin to an input
GPIO.setup(channel, GPIO.IN)

# This line tells our script to keep an eye on our gpio pin and let us know when the pin goes HIGH or LOW
GPIO.add_event_detect(channel, GPIO.BOTH, bouncetime=300)

# This line assigns a function to the GPIO pin so that when the above line tells us there is a change
GPIO.add_event_callback(channel, callback)

# This is an infinite loop to keep our script running
while True:
    # This line simply tells our script to wait 0.1 of a second, this is so the script doesnt hog all of the CPU
    time.sleep(0.1)
Start at boot
First open a file for editing:
sudo systemctl --force --full edit myscript.service
then add:
[Unit]
Description=My script
After=multi-user.target

[Service]
User=root
WorkingDirectory=/home/pi
ExecStart=/usr/bin/python3 /home/pi/moisture.py

[Install]
WantedBy=multi-user.target
Save/close and then enable and start (and check) the service:
sudo systemctl enable myscript.service
sudo systemctl start myscript.service
sudo systemctl status myscript.service
If you have any problems getting it to run, here is the extra I had to install:
sudo apt-get install python3-rpi.gpio
and to disable power management for the wireless interface
iwconfig wlan0 power off
That's it! This has the potential to be a great plant saver and hopefully keep our plant from dying of thirst :)